BINDING TUTORIAL - PART 2
Now I am going to turn the binding over the edge and hand stitch it down.
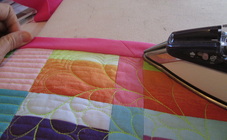
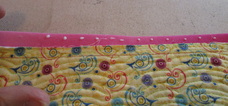
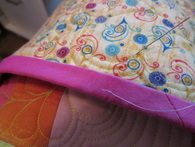
First, take your quilt to the pressing surface and place it right side up. Press the binding away from the quilt top, being careful not to press any tucks into the folded area.
Now I am going to turn the binding over the edge and hand stitch it down.
First, take your quilt to the pressing surface and place it right side up. Press the binding away from the quilt top, being careful not to press any tucks into the folded area.
The corners will naturally want to stand up and I let it do so at this point. I also now trim off all of the thread loops at the corners.
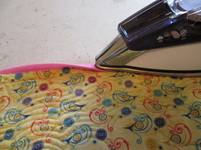
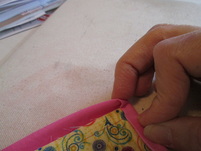
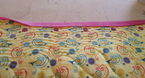
Turn the quilt to back and press the binding over the edge, pulling the fold to finish just beyond the stitching line from stitching the binding on the front. Pull the binding tightly enough that there is no empty space in the binding and the quilt completely fills the binding.
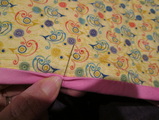
When you get to a corner, first press one side, up through the corner
Then fold the adjacent edge over, mitering the corner. Press edges in the order shown in the photos (not the reverse order) and the bulk of the fold will be on opposite sides of the miter on opposite sides of the quilt. This results in a flatter corner.
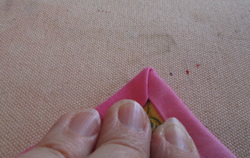
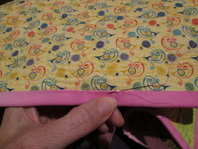
Here is a nicely folded miter. Now press this so that you have good creases to use while this is stitched and glued down. Do all sides and corners and press well.
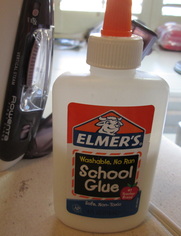
Yes, I do glue the binding down before I sew it by hand. It means that I need no pins, binding clips, etc. There are no gaps between areas that are held in place and all stays straight and flat as I carry it around to work on the binding. You want a glue that will easily wash out. Roxanne's does make a nice glue which would work well, but it is fairly expensive and harder to find. School glue is just corn starch, is super cheap (especially at Back-to-School time), works well and can be found everywhere from the grocery store to the craft store, office store, big box discount, etc.
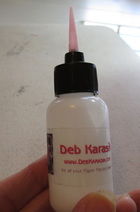
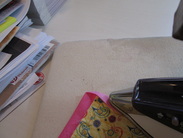
You will want a nozzle with a fine tip for it. This little refillable bottle is available from Deb Karasik on her website (www.DebKarasik.com). However, if you look in the local craft store, they may well have little metal tips that fit on little bottles. Look in the aisle with decorative painting supplies.
I have recently started using just the nozzle on the bottle pictured above. Make sure to just barely cut it open - not too deep. And I squeeze it gently to get small dots or a thin line and just move it along the edge of the quilt. This saves cleaning out the fine nozzles all the time.
I have recently started using just the nozzle on the bottle pictured above. Make sure to just barely cut it open - not too deep. And I squeeze it gently to get small dots or a thin line and just move it along the edge of the quilt. This saves cleaning out the fine nozzles all the time.
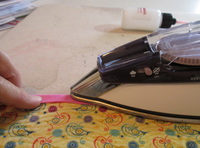
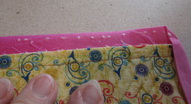
Now to glue down the binding - this picture shows the binding flipped up away from the raw edge of the quilt and a series of tiny dots of the School Glue placed along the underside of the binding. I like the glue close to the fold, but not right on the fold. I don't want any to ooze out and it can be hard to sew through the glue so I keep the very edge clean.
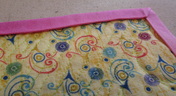
Now fold the edge back down so it is just the way you pressed it with the fold just over the stitching line. I fold the binding flush against the quilt so that there is no space in the binding that is not filled with quilt. This means my binding is slightly wider on the back that on the front. If you wish to have the front and back more equal, cut your original strips slightly narrower. Leaving unfilled binding means that area will wear and develop holes more quickly than filled areas. Press with a hot iron. Hold the iron for at least 10 seconds in place. If your iron doesn't get very hot, you will need to hold it longer. The glue needs to dry. It will hold in place when dried.
After pressing.
I glue a corner the same way I pressed it. Here the glue dots have smeared together a little, but it is still very little glue. I continue the dots putting one on the folded underside of mitered corner. Press the same way until dry.
Now put glue on the adjacent corner and fold over. Adjust the miter in the corner so that the fold comes out exactly in the center and the edges of the binding are even. Press again.
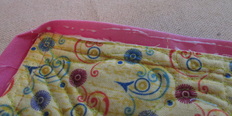
A pressed corner! Do three more and you are ready to sew.
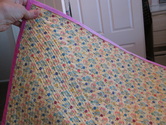
Here is the quilt from the back with the binding all glued in place and pressed. I love how nicely everything stays in place. If you find you have pressed something down that isn't exactly where you want it, a drop of water will dissolve the glue and you can reposition it, add a new drop of glue and press it where you want it.
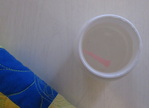
I place my glue filled nozzle in a jar of water until I get around to cleaning it thoroughly. The water keeps the glue wet and it is easier to wash out. (Sometimes it is days before I get around to washing it out!) ( Sometimes it completely dries up and I need to start over! which is why I've started using the nozzle on the bottle.)
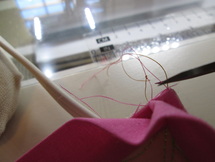
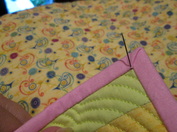
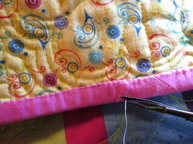
I use a fine cotton thread to bind. Binding is really hand appliqué so I use the same techniques for both. This is Aurifil 50 wt. 2-ply thread in a pink to match the binding. I have tied a very tiny knot in the end of the thread. I start anywhere along a straight side.
To start sewing I take a small stitch only through the inside layer, so that the knot is well underneath the edge of the fold and hidden in the binding.
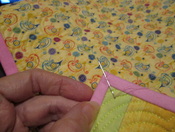
Now I take small stitches. The needle goes down into the quilt exactly opposite where it comes out of the binding. I take a shallow bite of the backing and batting and come back up through the very edge of the binding. These stitches are slightly more than 1/8". Continue stitching to a corner.
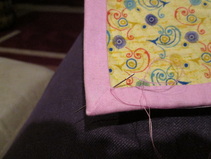
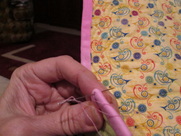
When I reach a corner, I place the needle through the quilt so it emerges on the right side of the quilt at the seam line of the binding.
Here the needle is emerging on the right side.
Now take tiny stitches hidden as much as possible under the fold of the miter up to the corner.
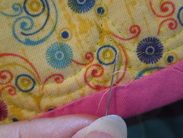
When close to the corner I once again run the needle through the quilt coming out on the back side this time.

More tiny hidden stitches back along the miter on the back and then continue stitching along the straight edge.
When I have completely sewn around the quilt, I make a final stitch and leave a small loop before pulling the stitch tight. Run the needle through the loop to make a knot. I usually go through the loop twice or make another loop and knot it because my grandmother always taught me that once was only half of a knot and wouldn't hold. I hear her voice every time I tie off a thread!

After the thread is knotted right next to the fabric, I run the needle through the binding, making sure not to come through to the front, and pull the thread tight.
Pull the thread tight (the hand that should be pulling the thread is instead holding the camera!) and clip off so the tail is buried in the binding.
DONE!
DONE!
